Chattanooga DayLilies construction,home,real estate Building A Guest House On Your Property

Building A Guest House On Your Property

Mention “guest house” and you might immediately envision swanky mansions of elite socialites. But guest houses are no longer just for the rich and famous. Many homeowners are building guest homes on their property as a creative solution to a variety of alternative living arrangements. 

What Is A Guest House?

While they go by a lot of names – cottages, tiny homes, granny flats – guest houses generally fall into two categories: guest houses or Accessory Dwelling Units (ADUs). Guest homes are made for short-term occupancy, or for family members that have access to the main house – giving a perfect balance of togetherness and privacy. 

Because people living in them have room to roam, guest homes are typically smaller and offer endless flexibility. They can provide a retreat space for teens and parents or an office space for those who need to work from home, and the kitchen table isn’t cutting it. It is also a great way to accommodate aging parents or adult children who are not quite ready to buy their own homes.

Where To Build A Guest House

The first thing to consider is —  what is the purpose of your guest house? Do you have frequent out-of-town guests, such as parents or children? Do you need a mother-in-law suite for an aging family member who needs an extra level of care? Are you looking for a flexible office space that can be turned into a teen hangout for movie night? 

Once you know what you want to do with your guest house, the next step is picking the location on your site, which will depend on a variety of factors. First, there are zoning laws to consider, and you should explore if there are any HOA restrictions. If you live on rural acreage, you will need to determine the optimal place for running electricity, Water, and sewer to the site. 

How To Build A Guest House

Building a guest house is not as easy as buying a tiny home on Amazon and throwing it in the backyard (wouldn’t that be nice!). Careful consideration and planning are needed to determine financing, building permits, design, and the builder. 

If you plan a guest house for an aging parent, design the space to meet their needs, such as mobility and safety concerns. You should also decide if you want the home to be attached or detached. An attached unit is more convenient to provide family access, while a detached unit will offer more privacy and flexibility for each lifestyle. 

Financing a Guest House

Securing a construction loan can be one of the most stressful parts of building a new home. Taking it one step at a time is important. Start with getting pre-qualified to determine your budget. When you know what you can realistically afford, your home-building journey takes shape. HiLine Homes has a list of Approved Lenders who may be able to offer you up to 100% financing. 

Know Zoning Laws and Restrictions

Each building jurisdiction has its own requirements, so it is essential to check if your project is allowable and feasible. It is important to check with your local city or county building department to find out your zoning and associated codes. The information about your property you will need to learn about feasibility is: 

  • Parcel Number
  • Zoning
  • Lot size
  • Location of Utilities
  • and Environmental Constraints

When starting the process, it may feel overwhelming. That is why it is key to lean on your Home Consultant to walk you through the project. 

Find a Floor Plan

Guesthouses can offer comfortable and flexible multi-generational living while saving money from hotel costs, renting, or assisted living facilities, so choosing the right floor plan is essential. When looking at floor plans, consider how the space flows for everyday use. Even if you plan to let friends and family use it for extended visits, you will want to offer them a cozy space for privacy. 

HiLine Homes’ Affordable Guest Home Options 

HiLine Homes is dedicated to helping families build a high-quality home with the opportunity of a strong equity position. You are sure to enjoy checking out our beautiful home plans designed to be Affordable and provide efficient use of space. Our smallest home plan starts at only 500 square feet, providing a quaint space with all the essentials. With over 40 home plans available and several perfectly suited as a guest home, you are sure to find the right fit.

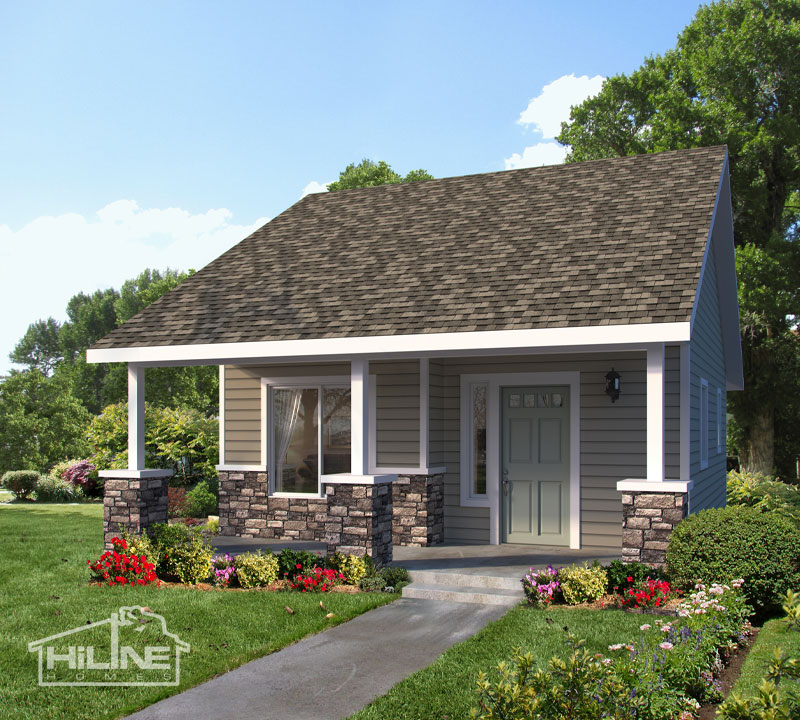
If you are looking for an attached option, Home Plan 500 and 500B are designed to be attached to another HiLine Homes floor plan when purchased together. It is a versatile option for families and guests looking for a place to retreat. 

Want a bit more space? Home Plan 800 adds a small laundry room, outdoor living space, and 8×8 storage area for even more flexibility and independence. Our Home Consultants will provide a free building consultation to review your site and answer your questions about the process. 

Cost Of A Guest House

As a rising trend, guest homes help families find alternative housing options, and HiLine Homes works to make that process affordable and attainable. Our traditional building program is designed with homeowner responsibilities such as preparing the property for HiLine Homes to build a complete home on your prepared property. Resulting in keeping the costs of building down and the possibility of building instant “sweat” equity. The best way to determine the cost of building your new home is to schedule a free home-building consultation. 

The HiLine Homes Experience

HiLine Homes has been building quality homes for over 25 years, developing a smooth construction process. We believe that knowledge is power and that an informed buyer makes confident decisions. We promise to give you clear communication and follow up on what we say we will do. 

For more information click the link below.

HiLine Homes

Related Post

Discovering the Flexibility and Charm of International Timber SoftwoodDiscovering the Flexibility and Charm of International Timber Softwood

International Timber softwood is renowned in the construction and interior Design industries for its flexibility, cost-effectiveness, and inherent beauty. Its broad application across numerous Building Projects demonstrates its ability to meet the varied needs of developers, designers, and homeowners.

International Timber provides an extensive selection of softwood species, from the light shades of Pine to the rich tones of Cedar, offering a range of options that cater to different aesthetic preferences and functional requirements. Each species possesses unique traits that enhance both the look and practicality of any endeavor.

A principal advantage of International Timber softwood is its ease of use. Due to its lighter density and consistent grain, softwood is particularly manageable, making it ideal for detailed construction tasks. It is especially useful for projects that demand precision and adaptability, such as structural frameworks, external paneling, or intricate joinery, positioning it as a top choice for both effective and economical building efforts.

Despite being softer than hardwood, International Timber softwood stands strong in terms of durability and structural integrity. With appropriate treatment, it can withstand wear and environmental elements, maintaining its quality and extending its lifespan.

The aesthetic appeal of softwood cannot be overlooked. Its natural grain patterns and varied hues bring a warm and inviting feel to spaces, enhancing them with a natural charm. This versatility makes softwood suitable for a range of design themes, from indoor décor to outdoor finishes and landscaping projects.

Sustainability is also a key consideration in choosing International Timber softwood. Harvested with a commitment to environmental stewardship, softwood promotes forest regeneration and reduces ecological impact, appealing to environmentally conscious consumers.

In summary, International Timber softwood exemplifies the lasting value and versatility of natural materials in the realms of building and design. Known for its adaptability, affordability, and environmental friendliness, softwood remains a favored choice for projects that seek to marry aesthetic grace with practical functionality. Whether employed in foundational structures, decorative features, or naturalistic outdoor environments, softwood makes a lasting impact with its timeless charm. For more information, please visit

internationaltimber.com

Trade Show ChecklistTrade Show Checklist

Trade shows are pivotal events for businesses looking to expand their network,showcase new products,and engage directly with their target audience. However,the success of participating in a trade show hinges on meticulous planning and preparation. This is where an essential trade show checklist comes into play. A comprehensive trade show checklist ensures nothing is overlooked,from initial planning stages to post-event follow-up,making it a vital tool for businesses aiming to make a significant impact.

The Essential Trade Show Planning Checklist

1. Early Planning and Goal Setting

  • Identify Objectives: Clearly define what you want to achieve by participating in the trade show. Objectives may include lead generation,product launches,or brand awareness.
  • Budget Allocation: Create a detailed budget covering booth fees,Design,promotional materials,Travel expenses,and accommodation.
  • Select the Right Trade Show: Research to find events that align with your business goals and target audience.

2. Designing Your Trade Show Booth

  • booth Design and Layout: Plan a booth that is welcoming and reflective of your brand. Consider traffic flow,product display areas,and interactive elements.
  • Promotional Materials: Design and order promotional items such as brochures,business cards,and giveaways. Ensure these materials are aligned with your brand identity.

3. Logistics and Operations

  • Book Accommodations and Travel: Arrange travel and accommodations well in advance to secure the best rates.
  • shipping and Handling: Coordinate the shipping of your booth materials,products,and promotional items to the venue.

4. Staff Training and Engagement

  • Staff Selection: Choose team members who are knowledgeable and enthusiastic about representing your brand.
  • Training Sessions: Conduct training sessions to ensure your team is prepared to engage with attendees effectively.

Trade Show Execution Checklist

1. Pre-Show Marketing

  • Social Media Campaigns: Utilize social media to announce your participation and engage with potential attendees.
  • Email Marketing: Send out emails to your subscriber list informing them of your presence at the trade show.

2. On-Site Engagement

  • Booth Staffing: Ensure your booth is staffed with friendly and informed representatives at all times.
  • Live Demonstrations: Schedule live demos or presentations to attract and engage attendees.

Post-Trade Show Follow-Up Checklist

1. Lead Management

  • Organize Leads: Sort and prioritize leads collected during the trade show for efficient follow-up.
  • Follow-Up Strategy: Develop a personalized follow-up strategy for leads,including emails,phone calls,and meetings.

2. Performance Evaluation

  • Analyze Outcomes: Evaluate the success of your trade show participation against your initial objectives.
  • Gather Feedback: Collect feedback from team members and attendees to identify areas for improvement.

Conclusion: Maximizing Success with Your Trade Show Checklist

A well-organized trade show checklist is the backbone of a successful trade show strategy. By breaking down the planning process into manageable tasks and focusing on both the big picture and the fine details,businesses can maximize their trade show investment. Remember,the key to a successful trade show lies not just in the preparation but also in the follow-through. Utilize this trade show checklist to ensure your business stands out,engages effectively with your audience,and achieves its trade show objectives.

How to open a Shipping ContainerHow to open a Shipping Container

Unlocking the Process: How to Open a Shipping Container with Giant Lockbox

Giant Lockbox, a prominent figure in the shipping container industry, provides valuable insights into the process of opening a shipping container. Whether you’re accessing your container for the first time or performing routine maintenance, understanding how to open a shipping container safely and efficiently is essential. With Giant Lockbox’s commitment to quality and customer satisfaction, mastering the art of container access ensures smooth operations and optimal functionality. Let’s explore the step-by-step process of opening a shipping container and discover how Giant Lockbox can assist you in unlocking your container’s potential.

Inspect the Container Exterior: Before attempting to open the container, conduct a visual inspection of the exterior to ensure that it’s in good condition. Check for any signs of damage, such as dents, rust, or corrosion, that may affect the operation of the doors. Ensure that the container is Sitting level on the ground and that there are no obstructions blocking the doors. Giant Lockbox’s containers are built to high standards of Durability and reliability, providing a sturdy foundation for accessing your cargo.

Locate the Locking Mechanisms: Shipping containers are typically equipped with locking mechanisms on the doors to secure the contents during transit. Depending on the container’s Design, these locking mechanisms may include padlock hasps, twist locks, or locking rods. Familiarize yourself with the type of locking mechanisms used on your container and locate them before attempting to open the doors. Giant Lockbox’s containers feature robust locking systems that provide enhanced security and peace of mind.

Remove External Locks or Seals: If the container is sealed with external locks or seals, such as padlocks or security seals, you’ll need to remove them before opening the doors. Use bolt cutters or a seal-breaking tool to cut through the locks or seals safely and effectively. Be sure to dispose of any broken locks or seals properly to prevent littering and maintain a clean workspace. Giant Lockbox’s containers are compatible with a variety of locking devices, allowing customers to choose the level of security that meets their needs.

Unlock the Doors: Once the external locks or seals have been removed, it’s time to unlock the container doors. Insert a key or combination into the locking mechanism and turn it clockwise to release the locks. If the container is equipped with twist locks, rotate them counterclockwise to disengage them from the container’s frame. For containers with locking rods, slide them out of their housing to unlock the doors. Exercise caution when operating the locking mechanisms to avoid pinching or trapping fingers. Giant Lockbox’s containers are designed for ease of use, with user-friendly locking systems that facilitate smooth operation.

Open the Doors: With the locks disengaged, you can now open the container doors. Stand to the side of the doors and grip the door handles firmly. Pull the doors outward and slide them along the container’s track until they are fully open. Be mindful of any obstacles or uneven terrain around the container that may impede the doors’ movement. Once the doors are fully open, secure them in the open position using door holdbacks or latches to prevent them from closing unexpectedly. Giant Lockbox’s containers feature robust door hinges and seals that ensure smooth operation and a secure closure.

Perform Interior Inspection: After opening the container doors, perform a thorough inspection of the interior to ensure that it’s clean, dry, and free from any damage or debris. Check for signs of Water intrusion, pest infestation, or mold growth that may require attention. Verify that the container is structurally sound and that there are no visible defects that could compromise its integrity. Giant Lockbox’s containers undergo rigorous quality control measures to ensure that they meet industry standards for durability and reliability.

Secure the Container: Once you’ve accessed the container and completed your inspection, it’s essential to secure the doors properly before leaving the site. Close the doors securely and engage the locking mechanisms to prevent unauthorized access and protect the contents from theft or tampering. If necessary, reapply external locks or seals to further enhance security. Giant Lockbox’s containers offer peace of mind with robust locking systems and tamper-resistant features that safeguard your cargo during transit and storage.